Photoshop将野花中的情侣增加梦幻的中性蓝灰色
(编辑:jimmy 日期: 2026/2/14 浏览:3 次 )
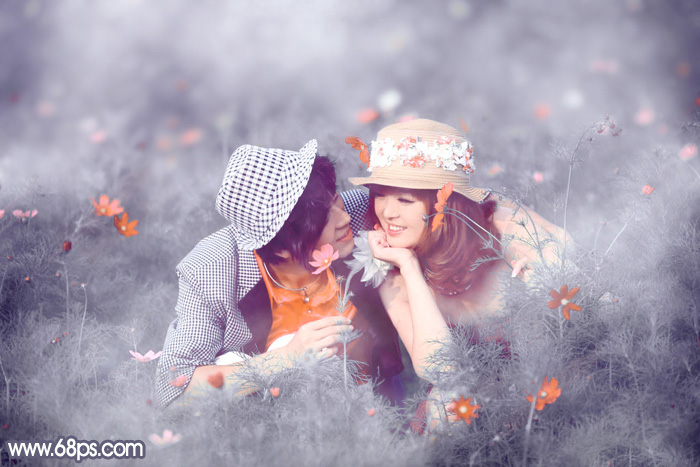
素材图片拍摄的不错,不过还不够梦幻。处理的时候先把主色转为比较简洁的中性色或淡色;然后用云彩滤镜及模糊滤镜增加梦幻效果;最后微调人物肤色,加强局部明暗即可。
原图

最终效果
1、打开素材图片,创建可选颜色调整图层,对红、黄、绿、洋红、中性、黑进行调整,参数设置如图1 - 6,效果如图7。这一步主要把背景部分的黄绿色转为青绿色。

<图1>

<图2>

<图3>
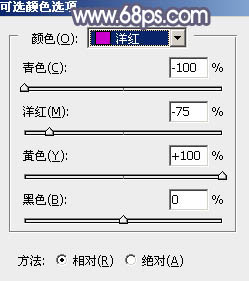
<图4>

<图5>

<图6>

<图7>
2、创建色相/饱和度调整图层,对绿色,青色进行调整,参数及效果如下图。这一步快速把图片中的绿色及青色转为中性色。

<图8>
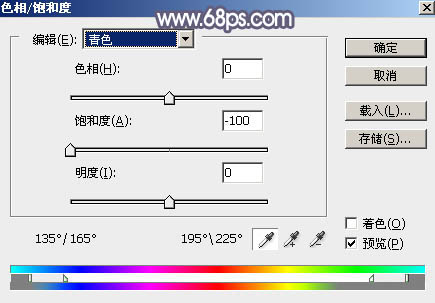
<图9>

<图10>
3、新建一个图层,按字母键“D”把前,背景颜色恢复到默认的黑白,然后选择菜单:滤镜 > 渲染 > 云彩,确定后把混合模式改为“滤色”,不透明度改为:70%。添加图层蒙版,用透明度较低的黑色画笔把过亮的区域擦出来,效果如下图。这一步给图片增加梦幻效果。
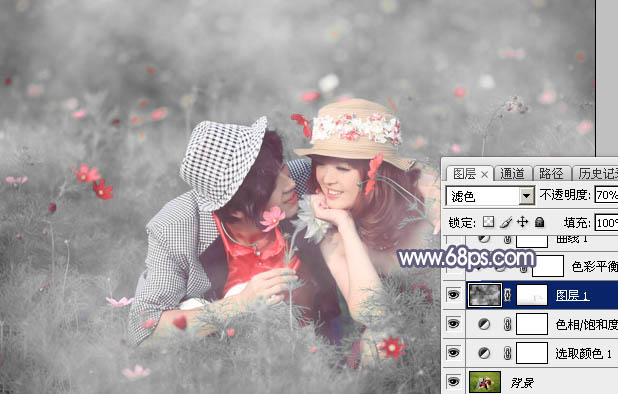
<图11>
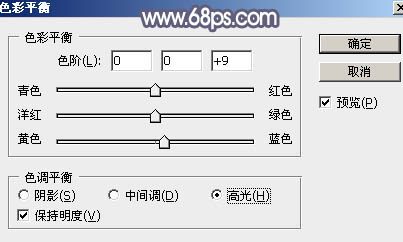
4、创建色彩平衡调整图层,对阴影,高光进行调整,参数设置如图12,13,确定后按Ctrl + Alt + G 创建剪切蒙版,效果如图14。这一步给云彩部分增加蓝色。

<图12>
<图13>

<图14>
上一页12 下一页 阅读全文
原图

最终效果

1、打开素材图片,创建可选颜色调整图层,对红、黄、绿、洋红、中性、黑进行调整,参数设置如图1 - 6,效果如图7。这一步主要把背景部分的黄绿色转为青绿色。

<图1>

<图2>

<图3>

<图4>

<图5>

<图6>

<图7>
2、创建色相/饱和度调整图层,对绿色,青色进行调整,参数及效果如下图。这一步快速把图片中的绿色及青色转为中性色。

<图8>

<图9>

<图10>
3、新建一个图层,按字母键“D”把前,背景颜色恢复到默认的黑白,然后选择菜单:滤镜 > 渲染 > 云彩,确定后把混合模式改为“滤色”,不透明度改为:70%。添加图层蒙版,用透明度较低的黑色画笔把过亮的区域擦出来,效果如下图。这一步给图片增加梦幻效果。

<图11>
4、创建色彩平衡调整图层,对阴影,高光进行调整,参数设置如图12,13,确定后按Ctrl + Alt + G 创建剪切蒙版,效果如图14。这一步给云彩部分增加蓝色。

<图12>

<图13>

<图14>
上一页12 下一页 阅读全文
下一篇:PS利用滤镜把操场风景图片转为日系绘画效果